
Backyard Composting Guide
Have you ever found yourself wondering if compost and soil are the same thing? While they are both beneficial, they are not quite the same. We’ll tell you why!
Compost is a small but important part of soil. Compost is made from your decomposed kitchen and yard waste and becomes the living part of soil. Soil is the top layer of earth and consists of varying proportions of minerals, organic matter, water, and air. The guide below details different methods of composting in your backyard as well as maintenance and troubleshooting guidance.
Building your Bin
Sourcing Materials
Here are a few ideas to help augment your composting materials:
Waste diversion is more fun with friends! Post on a community bulletin board such as Nextdoor or a community marketplace such as Craigslist or Freecycle. To let your neighbors know you are looking for compostable materials such as egg cartons, shredded paper, and cardboard or food scraps.
Know someone with a lawn? Ask for their grass clippings which make a great nitrogen additive to your bin! Provide them with a trash can, tarp, or old sheet to help collect the clippings in.
Find a friend that brews beer that is willing to give you some of their spent barley. A little barley goes a long way in generating heat in your compost pile. Be sure to mix the grain well with the other materials in your bin to avoid attracting critters. If you don’t know any brewers, try contacting a brewing club or local brewery.
Obtain mulch/wood chips from a tree trimmer. There are multiple ways to do this. One way is to phone a local tree trimmer. Another way is to sign up with getchipdrop.com. Chipdrop matches arborists/trimmers with people who want wood chips which allows the arborists to get rid of their woodchips without having to pay dumping fees. The advantage of Chipdrop over the direct contact method is that you can specify types of wood that you will not accept. Please be aware that these loads can be VERY large, up to 15 cubic yards. If you see a tree trimmer working in your neighborhood, you can stop and ask them if they are willing to drop off at your home and ask how big they estimate the load will be. The advantage of this method is that you know exactly where the wood is coming from and how big the load will be. We recommend that you line the drop site with a tarp to prevent staining your driveway from any oils that may come from the wood chips.
Ask your favorite business if they have organic materials that they aren’t able to recycle. Solana Center often gets juicing pulp from a local juice bar, and coffee grounds from local coffee shops. The former works well in worm bins, and coffee grounds are an excellent way to bump up the nitrogen in your compost pile.
Browns
Can I make a traditional compost pile with paper as my only “browns” material? What else can I use? Making a traditional compost pile with paper as your only brown is doable, but not optimal.
In order for the materials of your compost to break down efficiently, a sufficient amount and balance of nitrogen (“greens”), carbon (“browns”), moisture, and oxygen are needed. Paper can retain moisture and clump together, which can increase the moisture in your pile and affect the oxygen levels. This is especially true with a passive style of composting as opposed to an active style in which the pile is regularly turned to incorporate air. Too much moisture and not enough oxygen can cause your pile to become anaerobic. This is indicated by an unpleasant smell; well-aerated compost never smells bad! To avoid this challenge, you’ll want to turn your pile on a weekly basis to mix air in, break apart clumps of paper, and keep materials loose and “fluffed.”
However, even if you choose to be more active and engaged with the maintenance of your pile, using paper as your only brown can affect the quality of the final product. Because paper has been highly processed, your finished compost can have a dense and pulp-like consistency, rather than being like soft and fluffy soil. It is also good to aim for diversity in your compost to create a final product with a higher nutritional content. Using other browns such as dried yard debris, bark, woody materials, or straw can also help maintain the oxygen level in your pile by creating small spaces for air. If varied types of browns are not readily available to you and you just want to compost food scraps, then vermicomposting may be a better way to go.
Here’s a list of “browns” you likely have around the house. These work perfectly in your compost bin!
Paper grocery bags
Newspaper
Tree bark
Shredded paper
Toilet paper rolls
Paper towel rolls
Brown lunch bags
Cardboard
Dryer lint
Coffee filters
Tea bags
Natural fiber fabrics
Cereal boxes
Packaged food boxes
Egg cartons
Hair
Junk mail
Food-soiled paper towels/napkins
Paper packing materials from shippments
Oxygen
An ample supply of oxygen is key to the success of your backyard compost bin. Decomposer microbes need oxygen for their metabolic functions to operate efficiently. Without access to oxygen, some microbes die and others switch to a different form of metabolism, anaerobic (without air) respiration. This has a few negative consequences:
Instead of the small amount of carbon dioxide produced in aerobic respiration, anaerobic conditions cause microbes to produce methane, a far more potent greenhouse gas.
Anaerobic respiration also produces hydrogen sulfide– this is why anaerobic compost stinks!
Anaerobic metabolism is slower than aerobic, so the finished compost will take longer.
Clearly, your compost pile will be a happier place when plenty of oxygen is available. But how can you make this happen? Here are a few ideas to help keep your compost breezy:
Use bulky materials on the bottom and throughout the pile
Large ingredients like sticks or big wood chips help create “pores” (spaces between the materials in the pile) that air can flow through. Before you build your pile, make a 4-5” layer of these bulky materials on the bottom of the bin and add your mix of greens and browns on top. When your pile begins to heat up and hot air rises up and out, this more open layer on the bottom will allow fresh air to rush in and replace it. You can build your pile on top of a wooden pallet for a similar effect. Adding in bulkier pieces throughout the pile will help with overall airflow as well; just note that these large chunks may take longer to decompose than the other materials in your pile. Once the rest of the compost is finished, you can simply take these pieces out and add them to your next pile.
Break up fresh materials
Fresh materials, like kitchen waste and weeds, tend to soften and compact in your compost pile. When kept in large pieces or clumped together, this can result in anaerobic pockets within the pile. Make sure any large pieces of fresh material are chopped into smaller pieces (aim for 1” or 2” cubes if you have the time) and mixed well with browns. Similarly, if you have a good amount of weeds or grass trimmings, it’s better to distribute them throughout the pile than to leave a heap of them together.
Keep your materials loose while creating your pile
“An ounce of prevention is worth a pound of cure” is a good motto for the home composter. A little extra care in building your pile can save you a good amount of time and effort in maintenance later on. One great way to prevent problems with limited airflow is to make sure your pile is layered loosely. To make this happen, set up your empty compost bin with a layer of bulky materials on the bottom. Then, mix your greens, browns, and the water you need outside of the bin– you can stir it up on the ground next to the bin, or in a wheelbarrow if you have one. Once it’s well mixed, gently layer your mixture into the bin with a compost fork or pitchfork. Don’t stir the mixture once it’s inside; this can cause compaction and negate your thoughtful work!
Add a passive aeration tube
Oxygen is most limited at the center of the compost pile, and air can only passively flow about 3 feet into a compost pile, meaning your pile should never be more than 6 feet across. However, you can go larger than this, or simply improve aeration in a smaller pile, by inserting a passive aeration tube in the center. An aeration tube can be made out of PVC pipe (at least 2” in diameter) that is taller than your pile and has large holes drilled through its length, or from hardware cloth rolled into a cylinder. Note, however, that this can also release some of the heat that builds up in the center of the pile and slow the process, so this may not be the best choice if you want to reap the benefits of hot composting.
Turn it around
While it’s the most physical strategy on this list, few things can bring air into your compost like a full footprint turn. This has the added benefit of redistributing the compostibles inside, exposing more materials to the heat at the center of the pile. If you’re hot composting, it’s best to do this after the pile has gone through its first peak in temperature and has dropped back down below 130° F. Pull the entire bin off the pile and place nearby, then thoroughly mix the materials, making sure to break up any anaerobic pockets (you’ll smell them) and add in moisture that was lost. If you started with a layer of bulky materials, move the partially-composted materials off before mixing and place the bulky pieces back in the bottom of your bin. After mixing, loosely layer materials back into the bin, just as you did with the initial build. Then sit back, relax, and watch as the fresh air and redistributed nitrogen heat the pile back up.
Here in San Diego, composters are locked in a delicate balance between adequate moisture and airflow. Just as too much water can prevent air from moving freely, increased airflow can carry away moisture and deprive microbes of the water they need. If you take advantage of these tips but still want to optimize the compost process, note that you’ll want to monitor moisture levels and add extra water when needed.
Do I need to shred or grind my materials to compost them?
Shredding and grinding materials speeds up the process of composting. Smaller pieces will break down faster in your pile because it increases the surface area. This makes the material easier for bacteria to break down the material. You do not have to shred or grind your materials. The process will just take longer.
If you would like to speed up the decomposition process in your bin, here are some shredding/grinding suggestions from our Master Composters.
For outdoor materials place clippings in a large bucket and then use hedge sheers to chop the material before adding to the compost bin. Augers are also a helpful tool for shredding materials. For large pieces, like tree branches, chipper/shredders can be very helpful.
For kitchen scraps our Master Composters suggest simply chopping up scraps with a knife before adding them to your compost bin or worm bin. Some of our Master Composters take it step further and blend their scraps in a blender before adding the materials to the bin.
Bin Maintenance
Temperature
Want to get finished compost faster? You may want to try increasing the internal temperature of your backyard bin! Contrary to popular belief, compost piles do not heat up or drop in temperature due to atmospheric conditions (i.e. sun exposure, warm weather or cold weather) but rather, as a result of heat generation by specialized bacterial populations.
Increased bacterial population density means faster decomposition due to more rapid consumption of nitrogen, carbon, moisture, and oxygen. This intensive resource consumption correlates to rapid fluctuations in bacterial population size and variety. This means that a pile is only hot for a finite period of time: temperature spikes will rarely last for more than a week, and peak temperatures are unlikely to be sustained for more than a few days.
Many composters will try and achieve multiple temperature spikes over several months, helping to neutralize any pernicious weed seeds amongst the pile, and producing finished compost in a shorter period of time.
While by no means an exhaustive explanation of the hot composting process, the following are some tips to experiment with creating some heat in your backyard bin!
Increase Volume
The greater the volume of materials (i.e. the more space and resources for bacteria to colonize and consume) the more likely the pile is to generate heat. Filling a bin full of material at the start or topping off a pre-existing pile will do the trick. Increasing the volume of compostables naturally increases the size of the pile core, where temperatures will be the hottest.
Note: It is possible to produce hot compost in small volumes, but requires a greater dedication to creating an optimal balance of inputs (i.e. calculating individual C:N ratios) and to habitual and responsive pile monitoring (i.e. ensuring consistent, even moisture content).
Increase Nitrogen
Adding nitrogen-rich ingredients like coffee provides “protein” for the bacterial communities, and will activate speedier decomposition processes in the bin. If adding a blast of nitrogen, aim to turn your compost to distribute the resource more evenly throughout the pile.
Maintain Moisture
Monitoring moisture levels to ensure even dampness is a surefire way to speed up decomposition (ideally, moisture content throughout the pile should be comparable to a wrung-out sponge). Other tips to retain moisture in the pile include keeping your bin in a shady location (slows dehydration from sun exposure) and keeping a layer of browns (i.e. burlap, pine needles) on the top of the pile.
Strategic Aeration
It is important to keep your pile aerated to provide enough resources for bacteria to thrive; however, turning too frequently can cause the pile to dry out. Timing turning with falling internal temperatures will re-generate heat in the pile, so responsive aeration is the best strategy to keep a pile consistently hot. Turning about once a week is a good rule of thumb.
Watch Your Thermometer
When it comes to composting, “the hotter the better” does not always apply. A pile is considered ‘hot’ when it reaches between 130°F -140°F. Beyond 150°F, beneficial bacteria will begin to die off in large numbers, and efficient decomposition may be compromised.
In order to determine if you are successfully generating heat, dig into the core of the pile to check for warmth (you might even see some steam). If you are interested in quantitatively monitoring internal temperature spikes, purchase a long-stemmed compost thermometer. Studying changes in the pile can be lots of fun, and many composters know off-hand their “personal best” temperatures!
Microorganisms at work
Curious about what microorganisms are residing inside of the compost pile and what they’re up to? Let’s dig in:
Psychrophiles arrive during the first stage of decomposition. They exist in the pile mainly between 55-70 degrees Fahrenheit (F). The psychrophiles start to digest the material and release carbon dioxide, water and heat. This heat causes the pile’s temperature rise which attracts the mesophiles.
Mesophiles thrive between 70 and 90 degrees F. The majority of the decomposition in your pile is performed by these microorganisms.
Thermophiles will be found in your compost pile when the temperature rises above 104 degrees F. These temperatures will kill off almost all harmful organisms and weed seeds that may reside in your pile.
If a compost pile rises in temperature, it is an indication that the composting process is going well. When the thermophiles run out of things to eat, the temperature will steadily drop. This is a good time to turn your bin, add water, and add more nitrogen-rich green material into the center of your pile. The addition of material that is nitrogen-rich, like coffee, manure, or fresh cut grass, will heat your pile right back up as the thermophiles go to work.
Compost thermometers are great ways to tell which stage of decomposition your compost pile is at. These can be purchased in our online shop. Wishing you all good luck and speedy decomposition!
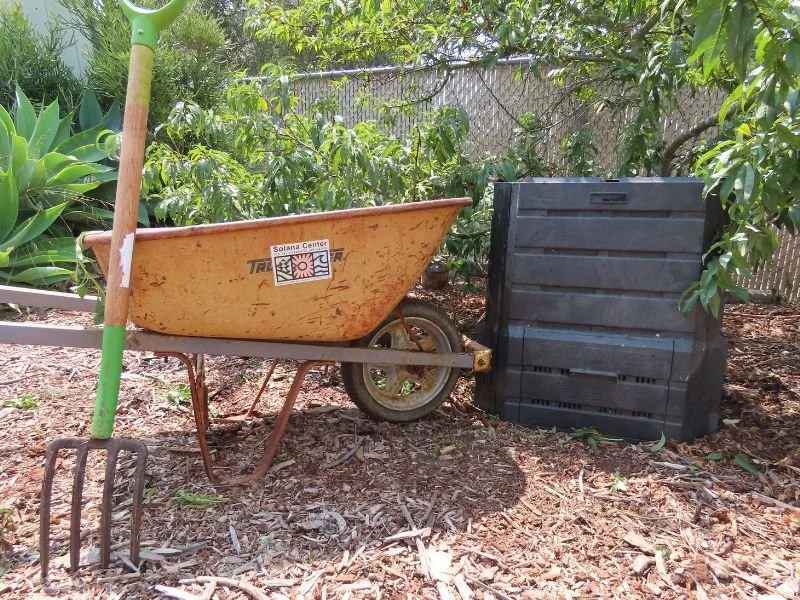
Location
There are several things to keep in mind when choosing a location for your compost bin.
Sun or shade?
A worm bin is best placed in the shade. Worms do not fare well in hot temperatures or during a deluge of water during a rainstorm. By placing them in the shade, they will be more protected from the elements and less likely to dry out.
As for a regular compost bin, direct sunlight does not cause the compost pile to heat up. The microbes working inside the compost are what heats the pile up. With this in mind, keeping your compost bin in the shade will decrease water evaporation. It can also make for a more pleasant composting experience.
Dirt or cement?
It is best to place a compost bin on dirt because it allows beneficial insects to crawl into the bin. These insects naturally occur in a healthy compost pile and will speed up the decomposition process. To prevent larger animals from digging underneath, put hardware cloth or wire mesh underneath your compost bin. Please keep in mind that if a compost pile is set on cement, it is likely that the cement will be stained.
For a worm bin, it does not matter if it is placed on cement or on dirt. It is more important that the bin is in the shade. People often keep worm bins inside their garage, under their counter, or in a closet.
How close do I want my compost bin to the house?
Most people do not want to put their compost bin directly up against their house because they are worried about it smelling or attracting pests. If you are composting correctly, your bin will do neither. That said, if you are beginner composter, it may be best to keep it away from your house.
On the other hand, if you are an experienced composter, how close you put your bin to your house should instead be determined by hose length (if your bin is further away than your hose is long, you’ll be lugging buckets over to your pile!) and ease of use. In our Southern Californian climate, compost piles can dry out easily. (Note: your pile should be damp but not soggy. Click here for more info.)
How much room will my compost bin need?
If you plan on being an active composter and turning your compost pile, it is important that you have a space twice the size of your compost bin. This will allow you to turn and rebuild your bin directly next to where it was previously sitting.
Turning your bin increases air flow and allows the microbes to break down the material more quickly. If you plan on having a more passive bin, this is not necessary, though you probably want a little room around the bin so it can be accessed from all angles. Worm bins, on the other hand, do not need extra space.
Turning
Too lazy to turn your compost bin? Is it not easy to turn, or smells bad? If you answered yes to any of these questions, an aerator could be the right tool for you!
Aeration (or the addition of air) is a very important ingredient in your compost pile. The microbes breaking down all the material in your compost pile need air to survive. These microbes are constantly using up the available air, so by turning or aerating your bin, you are ensuring they will continue to thrive. When there is not enough air in your compost pile, decomposition turns anaerobic. In anaerobic decomposition, a different variety of microbe is breaking down material without air. The digesting microbe lets off sulfur which means the compost pile can start to smell!
Aerators come in two main styles. They either have wings or they look like a corkscrew. The aerator to the left is pushed straight down. As it is lifted, the “wings” at the end of the aerator spread out, moving material and allowing for air flow. In the picture on the right, the aerator is rotated into the compost pile to the desired depth. It is then pulled straight back out.
This aeration method of pushing or rotating the aerator into the compost pile and then pulling it back out is less time consuming and requires less physical exertion than turning a compost pile with a pitchfork. Aerators do increase air flow in the pile, but not to the extent that turning the entirety of the pile would. If you want to harvest your compost quickly, turning the whole pile is the most successful method. If you don’t want to spend the time, are looking for something less physical, or do not have compost bin that is easily turned, an aerator is a great alternative to increase air flow in your compost pile.
If you are interested in purchasing an aerator, Solana Center has some for sale at our Climate Solutions Shop.
Harvesting
How long will it take until my compost is ready to be used? The timeline for composting depends on a number of factors. There are three basic approaches to composting which can be mixed and matched based on resources available and the composter’s goals. They are passive composting, active composting, and hot composting.
Passive composting (also referred to as cool, continuous composting) requires the lowest levels of engagement for pile set-up and maintenance and accordingly, takes the longest to produce finished compost, usually sometime between 6-18 months. Active composting requires more time and effort for set-up and maintenance but can produce compost in 5-6 months. Hot composting is the most time and labor intensive of all the methods, but yields finished compost in the shortest period of time, usually in 3-4 months.
Consider the following factors when estimating how long your pile will take to fully decompose:
Particle Size – Chopping pile contents into small pieces increases the surface area of the material, allowing for more rapid decomposition.
Volume of Material- Filling or nearly filling a bin at the start (as is common practice in hot composting) supports a larger community of microorganisms (especially heat-loving bacteria) and creates an environment that fosters more efficient decomposition. In general, piles with higher internal temperatures produce a finished product more rapidly.
Water- Keeping a pile evenly moist supports a more efficient community of decomposers, and is essential to speedy decomposition. Aim for the contents to be the dampness of a wrung-out sponge.
Turning- Turning a pile approximately once or twice a month helps to mix materials and create air pockets, which support a more diverse and fruitful decomposer population and increases the speed at which materials break down.
Curing- Immature compost can kill seedlings and beneficial organisms, so make sure your compost has been cured before use. Curing is the penultimate stage of composting, referring to a period where pile contents cool, rest, and complete decomposition without the addition of new materials. Curing usually lasts 2-4 weeks.
Have more composting questions? Attend an upcoming composting workshop!